How To Apply Ceramic Coating on Wheels?

It's hard to imagine a car owner who truly enjoys deep cleaning all the dirt and grime from every nook and cranny of their wheels. Applying a ceramic coating to your wheels puts off this painstaking task by repelling the gunk that likes to stick to your wheels. Not only that, when you do get cleaning, the process would be a lot less stressful.
New Car Protection: XPEL Fusion Plus Paint & PPF Ceramic Coating
Discover the future of vehicle surface corrosion and wear resistance solutions.
LEARN MOREWhat You Need to Ceramic Coat your Wheels
First, you'll want to gather all the supplies necessary to clean and prepare the wheels before coating them with ceramic. We find it absolutely necessary and useful to have a wheel brush with gentle bristles to clean off the insides of your wheels. Keeping a wash bucket that you will use for wheel cleaning is a must, along with a drying towel for use after you have washed the wheels.
Get your hands on the right cleaning products for wheels. A tar remover and iron remover created for cleaning cars are what you're looking for. You'll also need a pH-balance car shampoo so you can remove the remaining contaminants after the brake dust and debris have been swept off.
A surface prep spray specifically for ceramic coatings is what you'll need as the last step. You will also need several microfiber towels and lint-free towels.
Along with all the above items -- all a must-have before you start coating the wheels -- we highly recommend getting your hands on a car jack to remove your wheels entirely. This way, you can detach the car wheels and clean them separately. This is the absolute best way to fully clean your wheel from debris and adequately protect it with a ceramic coating.
Before you start the next steps, you should have all the tools needed to remove the wheels. Final tip: if you could find a shaded area where you will do the ceramic coating, it would be for the best.
Here is a recap of the tools you need for the process:
Car Shampoo
Soft Bristle Brush
Wash Bucket
Tar-Removal Spray
Iron Removal Spray
Several lint-free application cloths
Several microfiber towels for drying
Ceramic coating prep spray
Car Jack & Wheel Removal Tools
Small Flashlight
How Long Does it Take to Prep & Apply Ceramic Coating On Wheels?
From start to finish, it should take 5 hours at best. However, don't plan on driving your car for up to 24 hours after the coating has been applied. You will want the wheels to absorb the coating properly before getting them reacquainted with the dirt on the road.
Step One – Clean And Prep The Wheels For Ceramic Application
If you're opting to do this absolute correct way, the process begins by removing all the car wheels. Now, if you are the owner of a single jack stand, the time required to get it done would naturally be longer as you're looking at removing one wheel at a time.
Here is the thing. You don't necessarily have to remove the wheels but doing so does make the process much more effective. For one, if the wheels are attached to the car, you won't be able to properly remove the debris stuck on the inner barrel of the wheel. The inside of the wheel is arguably the side of the wheel that needs this the most, as it will be exposed to the most brake dust. It's also important to know that some of the ceramic coatings can accidentally seep into the brake rotors when the wheel is attached to the car. This increases the chances of a potential brake failure.
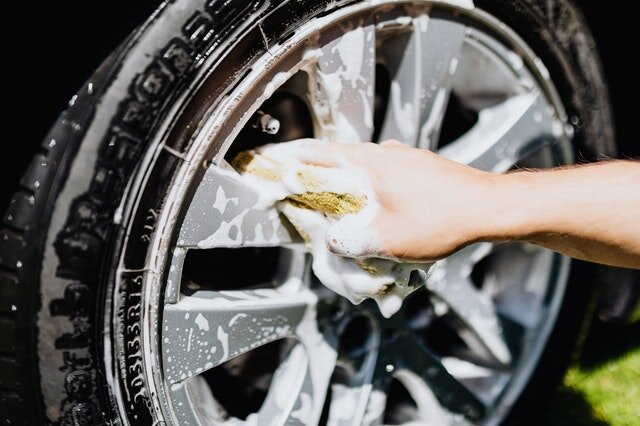
Once you have removed the wheels, start cleaning the wheels with your car shampoo and water. Do your absolute best to clean the inside and outside wheel from as much dirt and grime as possible. Rinse the wheel off and dry it once it's been properly scrubbed. For the tough, sticky deposits of tar and rubber, don't worry. The tar remover is perfect for these areas.
Spray your iron remover all over the wheels. This will decontaminate the wheel from any iron deposits and is critical in allowing the ceramic coating to properly bond with the wheel's surface. Rinse off the iron removal spray and the exposed iron. Follow this up by drying the wheel off.
Next is to apply your tar removal spray. Put a heavy coat on all areas of the wheel. Let it soak according to the manufacturer's recommendation. This allows the solvent time to break down the tar. Wipe off all the spray and loose debris.
As a final step, it's time to apply the surface prep. Remember that you can never use too much surface prep spray, but you can undoubtedly use too little. To make sure we use plenty, you'll apply two coats. Go heavy on the first coat by spraying a quarter of the inside or outside wheel with several spritzes. Use your lint-free towel to wipe the area until it's dry. Apply a second, lighter coat in the same area and wipe dry with a new section of your towel. Inspect the site and ensure no oil, handprints, or other visible signs of contamination can be found. Repeat in quarters, across the entire wheel.
Step Two – The Actual Application Process
Once the wheel looks as clean as an unused dinner plate, it's time to apply the ceramic coating. While you can do the job outdoors, make sure there is plenty of shade and no direct sunlight on the wheels. Ensure that the coating is not applied to the bolt holes or the lug nuts. The application process itself is no different from how you would apply paint to glass.
Pour about 10 to 15 drops of the coating on your applicator. Apply the ceramic coating methodically from left to right and from top to bottom. Let the ceramic coating stew for some minutes.
You should begin to see the wheel "sweat." This means that the chemical process is complete. The sweat is actually a ceramic coating that is leftover and has nothing to bond to. Clean this off with a microfiber towel. Once the sweat is removed, use a second towel to buff the wheel.
Before you finally finish, use a small flashlight light to identify any areas you may have missed in the buffing and wiping process. These unwiped areas can harden and create a high spot or dark spot on your wheels if left alone.
What You Should Do To Keep The Coated Wheels Clean
As is the case with any kind of car part coated with ceramic, you should put off washing the wheels for at least two weeks after you have applied the coating. The good part is that cleaning the wheel is made very easy once you have ceramic coated it.
We recommend using a car wash shampoo free of wax and is pH neutral to wash the wheels. The coating is there so that dust and grime do not collect on your wheels in the first place, so cleanups become easy.
Sometimes, cleanup can be as simple as just spraying water, and your car's wheels will be clean. Other times, car shampoo is required to get rid of the small amount of debris collecting.
Final Thoughts
The process for ceramic coating wheels is straightforward. It's a matter of cleaning and then applying the coating. After you have coated the wheels, remember to never use cleaning agents or iron remover on it. These products are harmful to the coating. On the other hand, pH-balanced car shampoos are excellent cleaning solutions.
Foam cleaners are out of the question too. Once you have coated the wheels, you will notice you won't need any kind of tough cleaning agent at all. The softer and chemical-free it is, the better. In fact, simply washing the wheels with water gets the job done in most cases. If water isn't enough, including a little soap in the water would do the rest.
If you are not up to the task of applying a ceramic coating to your wheels, hire a professional detailer to do it for you.


